


Introduction
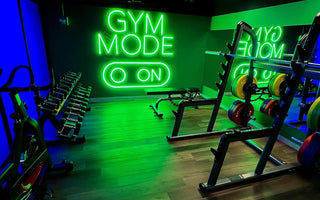
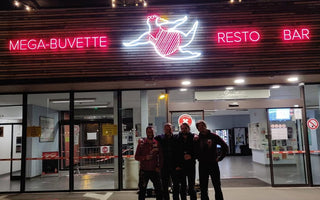
LED neon signs are a great way to add a touch of color and personality to any space. Whether you've just purchased a new LED neon sign for your business, home, or event, or you're looking to relocate an existing sign, knowing how to properly mount it on a wall is essential.
Proper installation ensures your sign is aesthetically pleasing and securely mounted. This guide will walk you through the steps to mount your LED neon sign on a wall, covering the necessary tools, safety precautions, and best practices for a secure installation.
Tools and materials needed
Before you begin, gather the necessary tools and materials:
-
Screws and wall/ceiling anchors
-
Tape measure
-
Pencil
-
Spirit level
-
Drill with suitable drill bits
-
Screwdriver
-
Mounting clips or brackets (if required)

Safety Precautions
Installing a neon LED sign involves handling electrical components. Follow these safety precautions to avoid accidents:
-
Turn off the power : Before handling the sign, make sure it is unplugged and the power is off to prevent any electrical accidents during installation.
-
Check the weight : Make sure the wall or surface where you plan to mount the sign can support its weight. For heavier signs, use sturdy hooks, brackets, or anchors for added security.
-
Avoid moisture : If you are mounting the sign in an area exposed to moisture (e.g., outdoor areas or bathrooms), ensure that the sign is suitable for these environments and that all electrical components are properly insulated.
Step-by-step guide to mounting a neon sign on a wall

Choose the location
Step 1: Choose the ideal location
Select the best location on the wall to mount your LED neon sign, considering visibility, height, and background. Ensure the location allows easy access to a power source, especially if the sign will be permanently plugged in. If necessary, place the sign near electrical outlets and manage the cables discreetly.
Step 2: Plan access to food
Make sure power adapters and LED controllers are hidden to maintain a clean appearance. Ideal locations to hide these components include spaces behind furniture, in wall or ceiling cavities, or other areas out of the way to ensure safety and cleanliness.
Step 3: Position for maximum impact
For optimal visibility, place the sign at eye level or slightly above. This makes the sign easily visible while enhancing its visual impact in the space.
Measure and mark locations
Step 4: Measure the installation location
Use a tape measure to determine the exact location on the wall where you want to mount your LED neon sign. Ensure the position matches the desired height and visibility. For larger signs, using a spirit level will ensure a straight and professional installation.
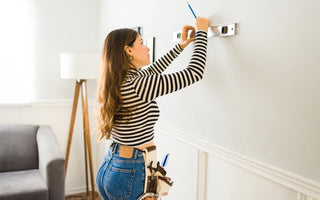
Step 5: Mark the Mount Points
Place your neon sign on the wall in the measured location and use it as a template. Use a pencil to mark the locations where the screws or mounting hardware will be attached. Double-check the markings to ensure alignment and accuracy before proceeding.

Drill the holes for mounting
Step 6: Prepare for heavy signs or difficult surfaces
If your sign is heavy or you're mounting it on sturdy materials like brick or concrete, you'll need to drill holes for wall anchors. These anchors provide additional support, ensuring the sign stays securely in place.
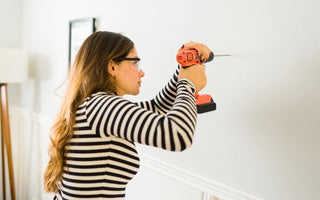
Step 7: Drill the holes
Using a drill, create holes at the points marked in step 5. For LED neon signs, make sure the holes match the mounting points on the sign's acrylic panel. Double-check alignment before drilling to ensure the sign will be straight.

Install the anchors or hooks
Step 8: Insert the wall anchors
If necessary, insert wall anchors into the drilled holes. This step is crucial for heavier signs or when mounting on surfaces like placo, brick, or concrete, as the anchors provide additional support and prevent the hardware from loosening over time.

Step 9: Attach the mounting hardware
Screw the mounting hardware into the anchors or directly into the wall. Make sure everything is securely fastened to support the weight of your LED neon sign. Check that the hardware is level and firmly attached before proceeding to the final installation steps.
Install the LED neon sign
Step 10: Position the LED neon sign on the wall
Carefully lift the LED neon sign and align the pre-drilled holes, usually located at the four corners, with the installed wall anchors.
Step 11: Secure the sign
Once aligned, ensure the sign is level and balanced. The sign should be perfectly aligned against the wall. Make any necessary adjustments to ensure stability and proper alignment.

Connect to power supply
Step 12: Connect the LED sign and controller to a power source
Once the LED neon sign is securely mounted, connect it to the LED controller. Make sure the controller is properly connected to the sign and the power source. Then, plug the sign into a standard outlet. Check that all connections are secure and place the power adapter out of sight.
Step 13: Pair the remote and store the controller
Before storing the LED controller, pair the remote control with the sign according to the manufacturer's instructions. Once paired and tested, store the controller in a secure location, such as behind furniture or in an area out of the way. Ensure all cables are neatly organized and hidden to complete the installation.
Test the sign
Step 14: Test the sign
Turn on the power to test your LED neon sign. Check that it lights up evenly, without flickering or dimming. Inspect the sign for any brightness or alignment issues. If everything is in order, your sign is ready to shine! Enjoy your new installation!

Common Mistakes to Avoid
-
Overloading wall anchors : Ensure the wall anchors or mounting hardware can support the weight of the sign. Using the wrong type or size anchor can cause the sign to fall and cause potential damage.
-
Poor placement : Measure and mark locations accurately. If the sign is not level, it may look unprofessional and could stress the mounting hardware, increasing the risk of it loosening over time.
-
Ignoring the location of the power source : Make sure the sign's power cord can reach the nearest outlet without the need for an extension cord, which can be unsightly or create a tripping hazard.
-
Insufficient insulation : For outdoor installations, ensure that all electrical components are adequately insulated and weatherproof to prevent damage from moisture or temperature changes.

Conclusion
Mounting a neon LED sign on a wall is a simple process when you take the time to prepare properly and follow the necessary safety precautions. By ensuring the sign is securely mounted, aligned, and properly connected to power, you can confidently display your custom neon LED sign in any space. Following these steps will ensure your sign not only looks great, but is also safe and durable for years to come.